Managing custom fields
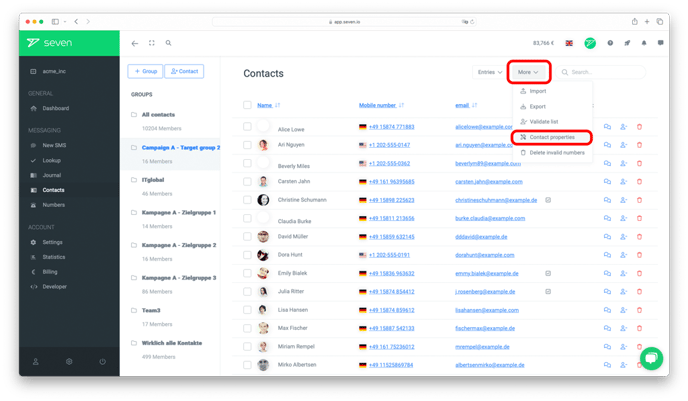
Open Contacts and click More in the top right corner. Pick Custom Fields from the menu.
The Custom Fields dialog lists all existing fields. Click Add Field to create a new one. Enter a Field Name, pick the matching Type and decide via the Show as Row toggle whether the field should appear as a column in the contact overview.
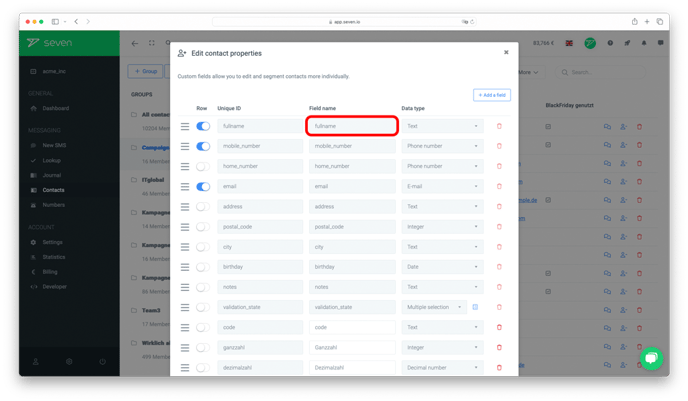
The drag handle on the far left lets you reorder fields by drag & drop. To delete a field, click the red bin icon and save.
Data types
| Type | Description |
|---|---|
| Text | Short text input |
| Integer | Whole number, no decimals |
| Decimal | Number with decimals |
| Date | Date value |
| Single Select | Pick one option from a list |
| Multi Select | Pick multiple options from a list |
| Checkbox | On/off toggle |
| Phone | Phone number |
| Email address | |
| Textarea | Larger text input for longer content |
Using custom fields
You can insert your custom fields into your SMS using placeholders. See the article Personalized SMS for details on placeholders.
Video tutorial: Import contacts & use custom fields
Watch our video tutorial on how to upload contacts and use custom fields.