In this article, you will learn how to create an RCS service and then set it up step by step. Once the service has been created, we will guide you through the configuration, including display name, description, colors, logo and banner. You will get a preview of how your RCS service will look to users. Here you will find all the important information you need to successfully launch your RCS service.
Create Service
In the Settings > Sender IDs area, you will find the Create RCS Service button.
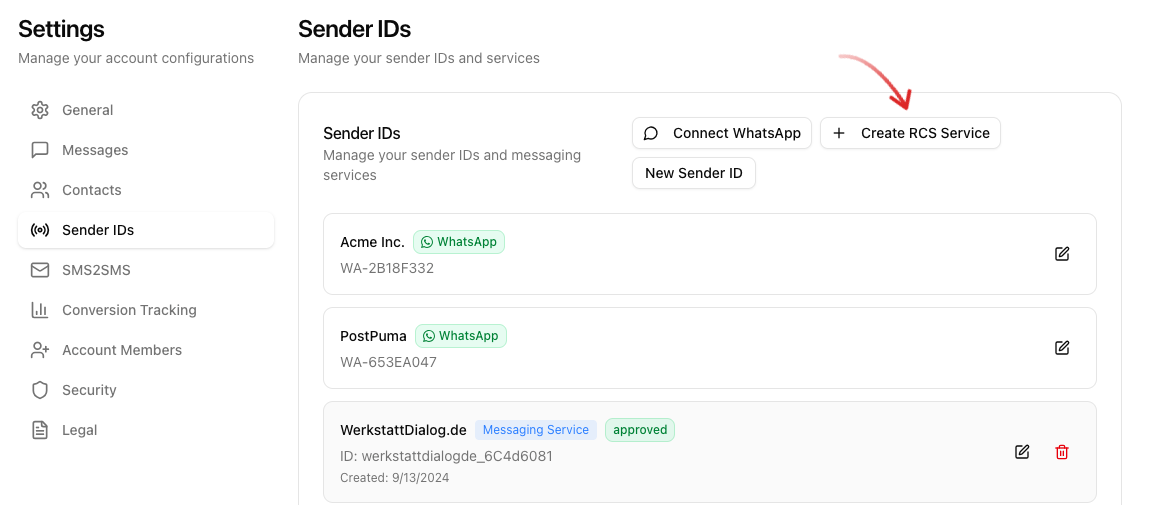
To start a new RCS service, you need to enter some basic information.
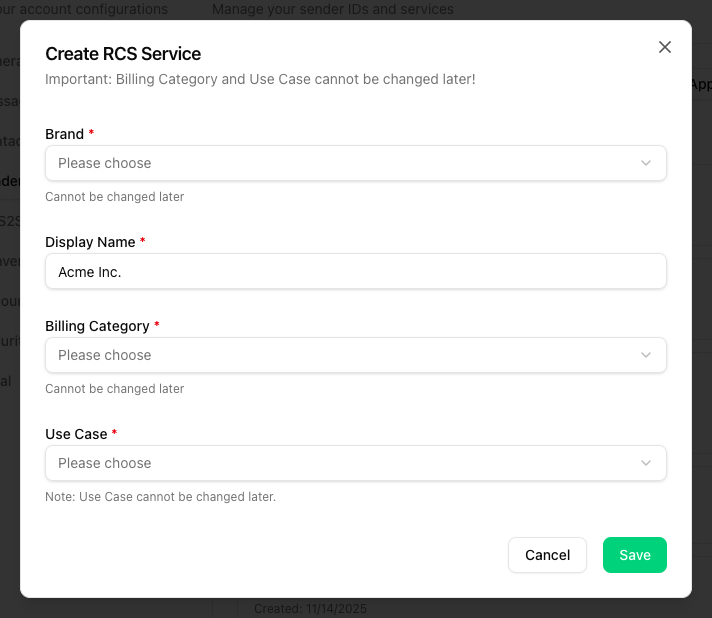
The following data is required to set up the RCS service:
Brand
Enter the name of your brand under which the RCS service runs. This name is not displayed to users and is only used to combine several services into one brand and for verification with the network operators.
Display name
The display name is shown to users when they receive a message from your RCS service. It should be short and clearly represent your brand.
Billing category
When setting up an RCS service, you must select the billing category that determines how sent messages are billed:
Non-Conversational
One-way messages without conversation support.Conversational
Two-way, conversation-based messages.
Important: The billing category and the use case cannot be changed after the service has been created.
Use case
Specify the way in which your RCS service is used.
Promotional
Advertising / marketing messages aim to draw users' attention to products, offers or promotions in order to promote sales or increase interest in the brand.Transactional
Transactional messages inform users about the status of actions such as orders, payments or appointments and are used to provide important, time-critical information without advertising content.OTP
One-time password (OTP) messages send users temporary codes to confirm their identity or authenticate actions, such as login or security-critical transactions.Multi-Use
Combines transactional and promotional messages in the same conversation, e.g. an airline sends a boarding pass and then offers a seat upgrade. Only use it for conversations that actually contain both. One-time passwords (OTP) and 2FA codes for logins are not allowed. Multi-Use is not available in every country (e.g. not in India).
For the use cases Promotional, Transactional and Multi-Use, the recipient is shown “Block and report” in the conversation. This only does not appear for one-time passwords (OTP).
Once this information has been entered, your RCS service is created and you can configure the display of the service.
Set Up Service
Once the service has been created, the detailed setup takes place. Here you can see what the configuration will look like and get a preview of the final look of your service.
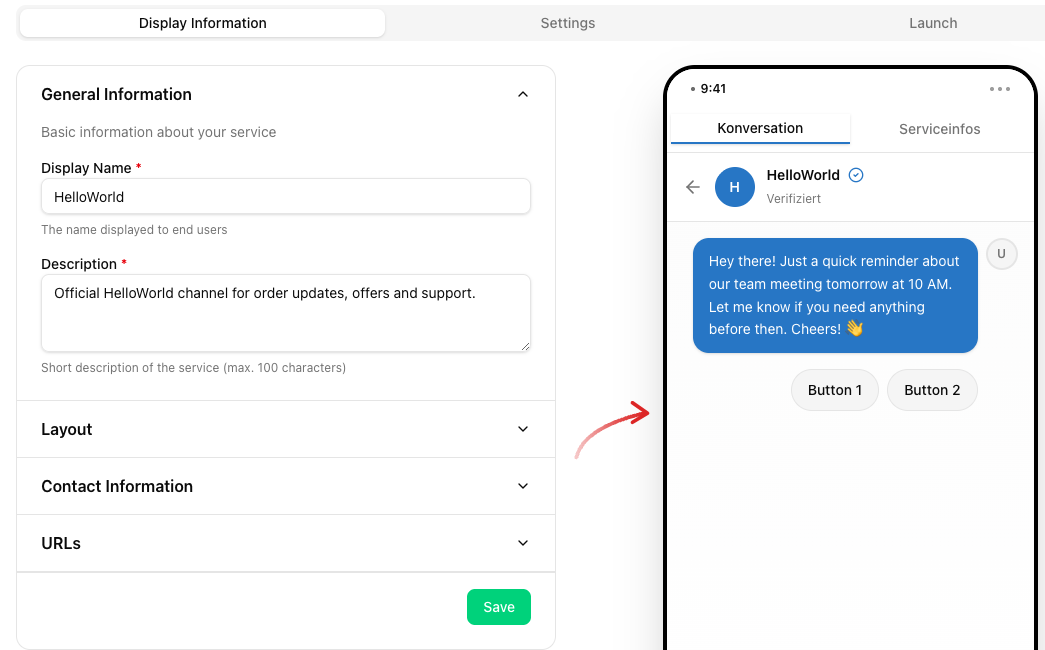
All information provided here is displayed directly to the user. On the right-hand side, you will see a preview of your RCS service in a conversation and the page with the service information.
General information
Display name: The name that users see in their messages.
Description: A short description of the service that informs users about its purpose.
Layout
Color: Choose a color that represents your brand.
Logo: Your company logo that will be displayed in the messages. The file must not be larger than 50kb and should be square with a resolution of 224x224. The logo should not contain built-in rounding or a cut-out circle - Google Messages automatically displays it as a rounded square.
Banner: A banner image to visually support your brand. The file may be a maximum of 200 KB in size and should have a resolution of 1440x448.
Contact information
Email: Contact address users can turn to if they have any questions.
Phone: Telephone number for direct support.
URLs
Website: URL to the main page of your company.
Privacy URL: Link to your privacy policy.
Terms URL: Link to your general terms of use.
Test Service
Next, enter one or more test number(s) for the RCS service that you would like to use to test your RCS messages.
RCS messages can only be sent to numbers stored here as long as the service has not yet been started.
Open your RCS service and switch to the Settings tab at the top.
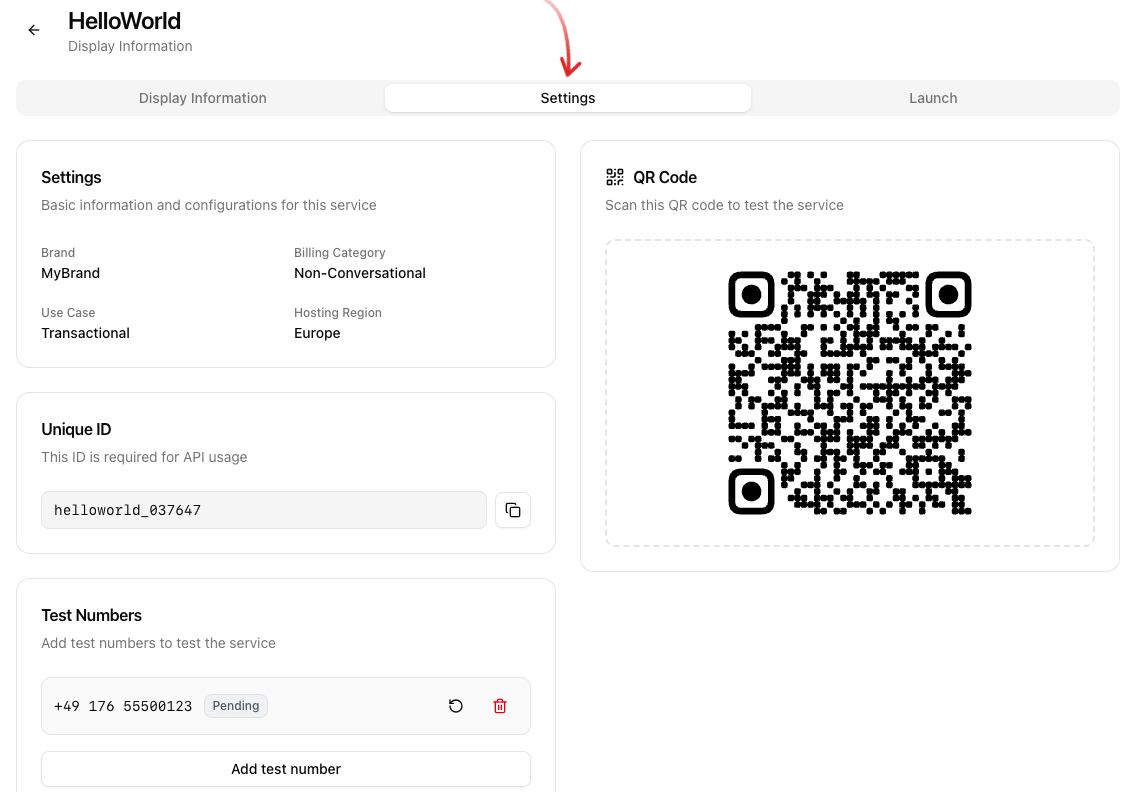
In the Test Numbers area, you have the option of inviting phone numbers to test the service. Click Add test number to do so.
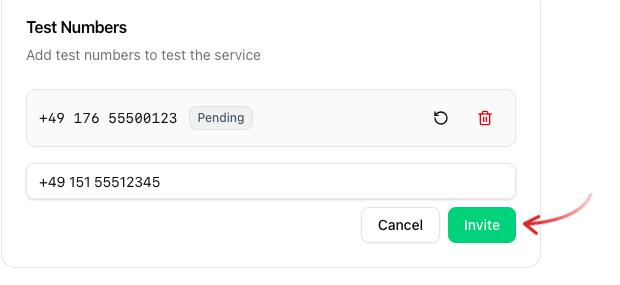
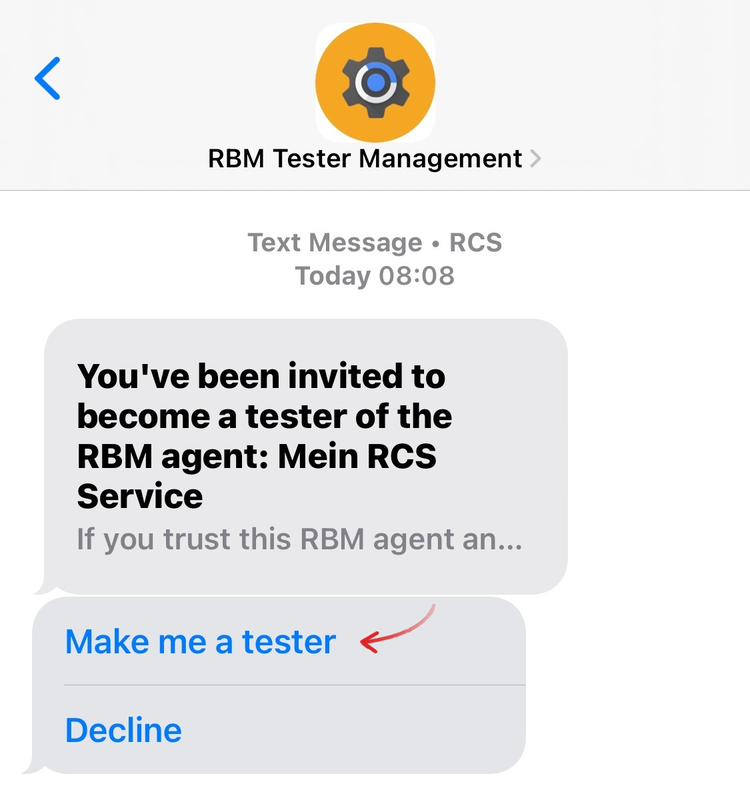
Enter the phone number and click the Invite button. The phone number will then receive an automated RCS message from Google to confirm the request as a tester. To do this, click on the Make me a tester button in the message.
Test via QR code
The Settings tab also contains a QR Code. When you scan it with your smartphone, a conversation with your RCS service opens directly in the messaging app. This lets you write a message to the service yourself and check how it responds to incoming messages. As long as the service is not live yet, this only works on devices whose number has been confirmed as a tester.
You have done it! You can now send RCS messages to the test number(s) via our web app, via HTTP API or via Mail API and start implementing your RCS service.
As soon as your service has been completed and sufficiently tested, you can submit it to the network operators for launch.
As soon as you have implemented your service you could launch your service.