With the Mail API you send messages by email: you send a mail to the fixed address of your configuration, seven evaluates it using your patterns and sends the result as an SMS, RCS, WhatsApp or Voice message. You define once in the configuration where in the mail the recipient, text and sender are located. This way the Mail API adapts to your application, for example a monitoring tool, a shop or your email client.
How to send messages afterwards is described in the articles Sending SMS via email and Sending RCS via email.
Create a Mail API configuration
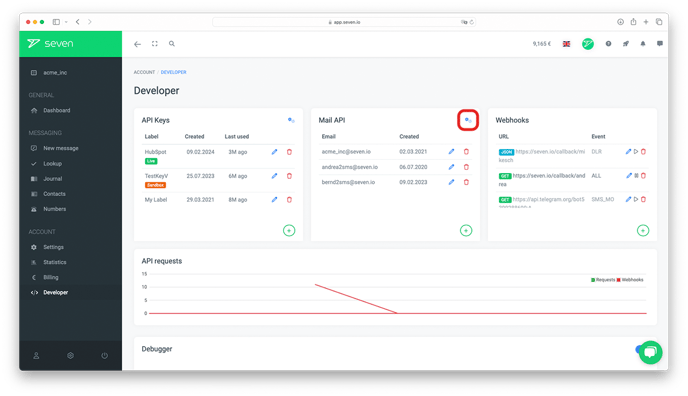
Open Developer -> API Access. The list shows all REST API keys, Mail API configurations and SMPP connections. Click Create New in the top right corner and select Mail API.
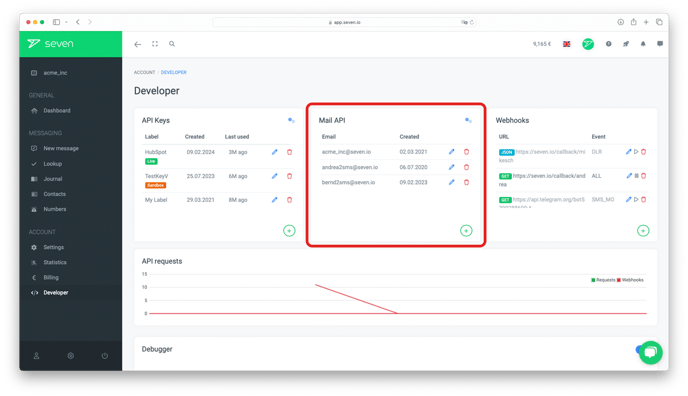
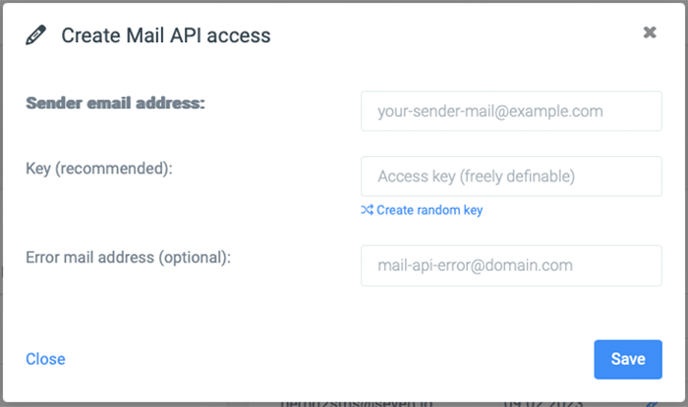
The Create Mail API Address dialog guides you through the configuration in five steps. You can create as many configurations as you like, each with its own senders, its own fixed address and its own patterns.
Step 1: Access
Under Allowed senders, enter the email addresses you send from: one address per line, up to ten per configuration. The gateway does not accept mails from other addresses. With *@your-domain.com you allow all addresses of a domain.
The following are not allowed:
- Addresses on seven's own domains (
seven.io,sms77.io,sms77.deand their subdomains) - Domain entries (
*@domain) for freemail providers such as Gmail or GMX - Addresses that are already proven in another seven account
These checks already run when you click Next, so you see errors directly at the input field.
Step 2: Patterns
Here you describe what your mails look like. Literal text in the pattern must appear exactly like that in the mail and serves as an anchor, variables in double curly braces capture the text in between.
- Address prefix pattern (default: empty): applies to the part of the address before the token. With
{{to}}, a mail to4917612345678.TOKEN@gateway.seven.iogoes to exactly this phone number. If the field stays empty, you send your mails to the address without a prefix and the recipient comes from the settings (step 3). - Subject pattern (default: empty): empty means the subject is ignored.
- Body pattern (default:
{{text}}): with the default, the entire mail text becomes the message text.
The most important variables are {{to}} (recipient: phone number, contact or group), {{text}} (message text) and {{from}} (sender ID). Under Advanced and WhatsApp you find further variables, e.g. {{delay}} for scheduled sending or {{label}}. The complete list is in the Mail API documentation.
Example: The body pattern (({{text}})) delay={{delay}} matches the mail ((Your order is on its way.)) delay=2027-01-15 08:00:00 and schedules the message for January 15, 2027 at 8 am.
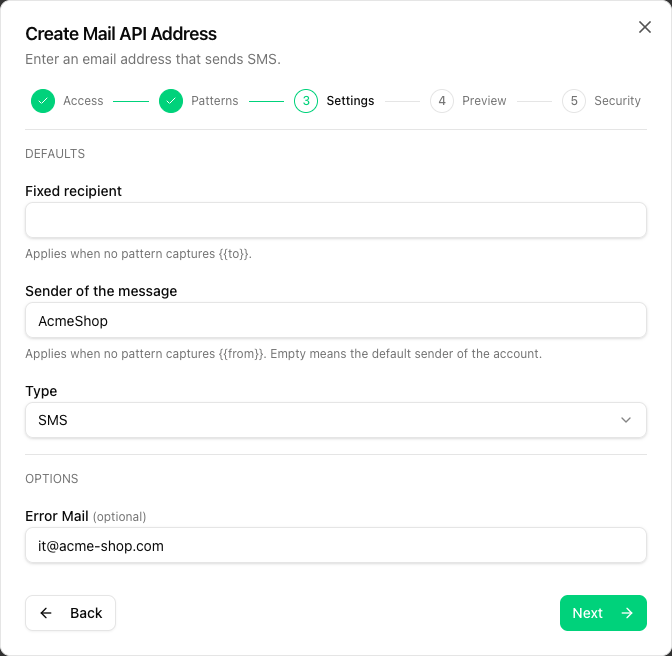
Step 3: Settings
Under Defaults you define what applies when the patterns do not provide anything:
- Fixed recipient: applies when no pattern captures
{{to}}and is then mandatory. - Sender of the message: applies when no pattern captures
{{from}}. Empty means the default sender of your account. - Type: SMS, RCS, WhatsApp or Voice.
Under Options you can optionally enter an Error Mail address to which error messages are sent.
Step 4: Preview
Before you can save, you check your patterns against a real mail. For this, each configuration has a Test address with the suffix -test, i.e. TOKEN-test@gateway.seven.io (with prefix e.g. 4917612345678.TOKEN-test@gateway.seven.io). Via Open sample mail your email client prepares a matching mail.
Send the test mail from one of the allowed senders. As soon as it arrives, you see the captured variables and the message that would result from it. Mails to the test address do not trigger any sending.
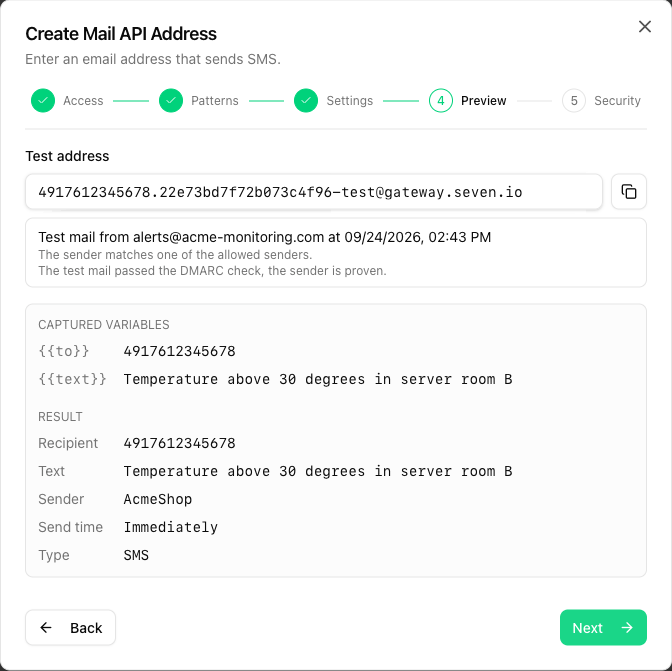
Important:
- Without a test mail, the configuration cannot be saved, not even when editing it later.
- A test mail from an address that is not on the list of allowed senders is displayed but does not count. In this case, send from the right account.
- If several test mails arrive, the newest matching one is the preview. Older ones can be expanded.
- If your network blocks the dashboard's live connection, the dialog automatically fetches incoming test mails every few seconds. Use Fetch test mail now to trigger this immediately.
Step 5: Security
In the last step you see the Fixed address of the configuration (TOKEN@gateway.seven.io), the Sender proof for each allowed sender and the status of the DMARC check. Click Save to complete the setup, the configuration can be used immediately.
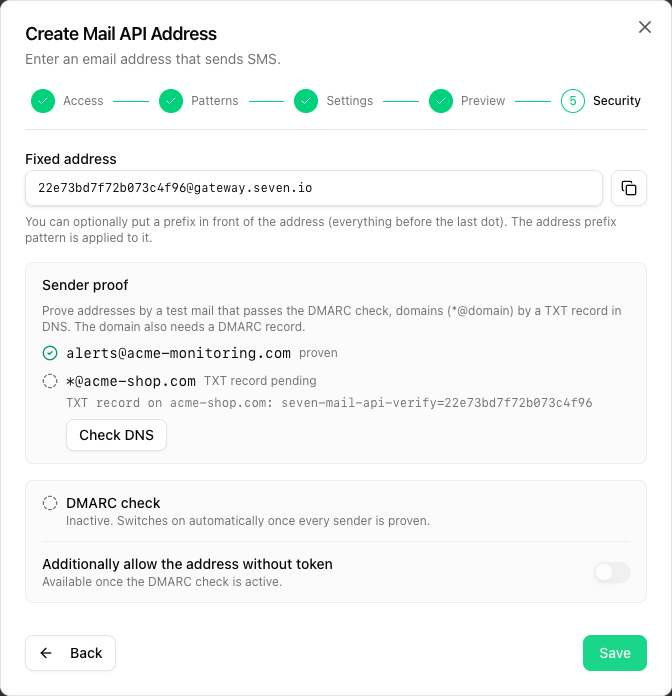
Sender proof and DMARC check
The gateway only accepts mails from the allowed senders. In addition, you can prove that the senders really belong to you. As soon as all senders of a configuration are proven, the DMARC check switches on automatically. There is no switch for it.
How to prove senders:
- Single address: Send a test mail from this address to the test address that passes the DMARC check. The test mail from step 4 already counts as proof if it passes DMARC.
- Domain entry (
*@domain): Create a TXT recordseven-mail-api-verify=TOKENon the domain and click Check DNS. In addition, the domain (or a parent domain) needs a DMARC record. seven checks both daily and withdraws the proof if the TXT record is missing for a few days.
Once the DMARC check is active, the gateway only accepts mails whose sender domain passes the DMARC check. This requires a DMARC record for your domain together with SPF or DKIM. Forwarding is not a problem as long as the DKIM signature is preserved. Rejected mails appear with code 904 in the Debugger. The error mail is then sent exclusively to the Error Mail address, never to the sender, because the sender could be forged.
If a test mail does not pass the check, the dialog names the reason, e.g. that the sender domain has no DMARC record, that neither SPF nor DKIM align with the sender domain or that the result refers to a different domain than the From address.
Good to know: You can no longer add unproven senders to a configuration with an active DMARC check. For senders without DMARC, create a second configuration.
Address without token
With an active DMARC check, you can additionally enable the option Additionally allow the address without token in the Security step. Then the prefix alone is enough as the whole address, e.g. 4917612345678@gateway.seven.io. seven assigns the mail solely via the proven sender of your configuration. The address with token keeps working. If you want to combine token and DMARC check, leave the option disabled.
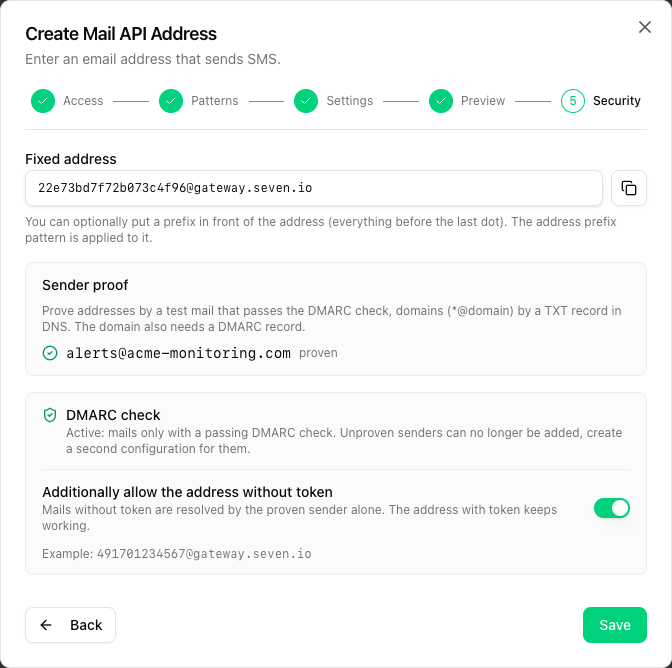
If the same proven sender uses several configurations with this option, the mail is not assigned and not sent.
Further Mail API settings
Open Developer -> Settings and expand the Mail API section. These settings apply to all Mail API configurations.
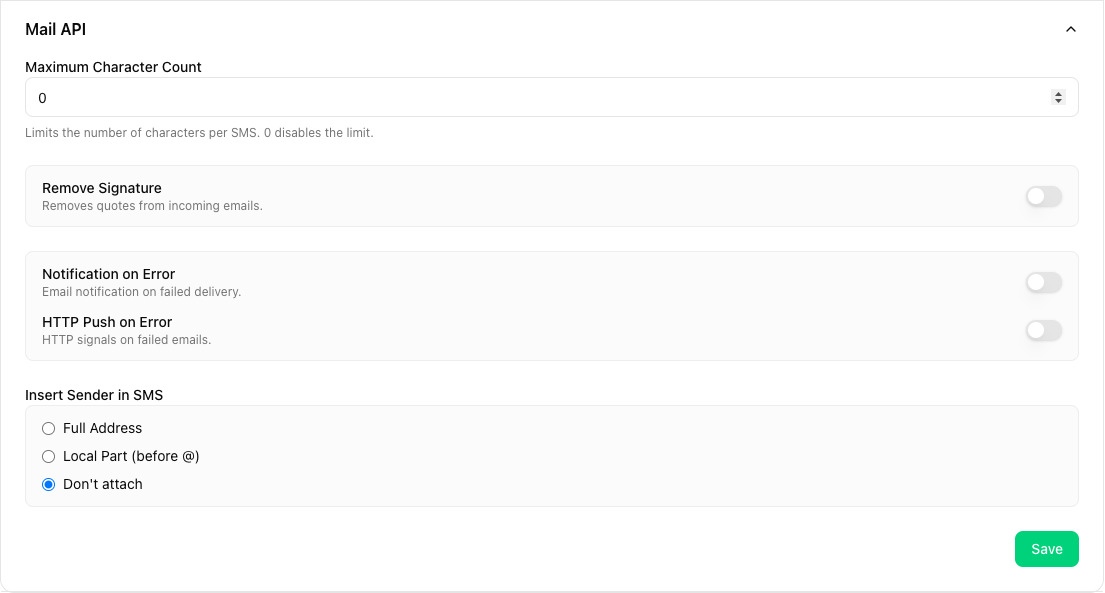
- Maximum Character Count: limits the length of the message so that accidentally included signatures or footers do not drive up costs.
0disables the limit. - Remove Signature: filters out quoted text (
> like these lines) before sending. - Notification on Error / HTTP Push on Error: you are informed by email or HTTP push if a mail cannot be processed, for example because a pattern does not match or the recipient is missing.
- Insert Sender in SMS: prepends the sender address of the mail to the message, either as Full Address (
someuser@domain.com), as Local Part (before @) (someuser) or not at all (Don't attach).
Existing configurations (legacy)
Configurations created before the fixed address was introduced are marked Legacy in the list. They continue to work in the classic format: the phone number is placed before @gateway.seven.io, control parameters such as key=, from= or type= go in the subject. Legacy configurations keep working unchanged and indefinitely, but only allow one sender and no DMARC check. For new applications we recommend a configuration with a fixed address and patterns.
Documentation
You can find the complete reference with all variables, examples and the classic format in the Mail API documentation.